Wednesday, September 25, 2013

Fig & Port Jam

With more ripe figs than we knew what to do with this summer, our last big harvest brought in three and a half pounds.  We had already made fig jam once, so I decided to switch it up by using port instead of water.  And, having such a large amount of figs made it worthwhile to can the jam in order to preserve it and be able to enjoy our figs all 
winter.  Note that this jam is thick, but not a jelly-like consistency since no pectin is used in the recipe.  If you wanted your jam to be more on the solid side, you can always add some. 
Ingredients:
  • 3-3 1/2 lbs fresh green or purple figs
  • 1 1/2 cups sugar
  • 3/4 cup port
  • 1/4 cup lemon juice
  • 1/4 teaspoon salt
  • 1 cinnamon stick 
Directions:

Slice each fig into four wedges, and then each wedge into either two or four pieces, depending on the size.  You want to end up with a uniform dice of relatively small pieces.  

In a bowl, combine the figs and sugar.  Mix and let sit for 15 minutes until the sugar has dissolved and the figs start to look syrupy.  
In a large pot over medium heat, combine the figs, port, lemon juice, salt, and cinnamon stick.  Bring to a simmer and cover.  Turn heat to low and cook for 15-20 minutes, stirring occasionally.

Remove lid and turn heat back up to medium low, or until it is simmering rapidly.  Let the mixture reduce, about another 15-20 minutes.  Stir frequently to avoid sticking or burning to the bottom of the pot.  
If you are planning to can the jam, now is the time to heat a large pot of boiling water and sterilize the jars for about 10 minutes.  

When the jam is at your desired consistency, remove the cinnamon stick and spoon it into the jars, leaving about 1/4-1/2 inch of room at the top.  
If you are not canning- let the jars sit at room temp and then refrigerate.  If you are canning, be sure not to screw on the lids too tight, and then boil the full jars for another 10 minutes.  Remove, and let them cool.  No need to refrigerate.  Enjoy the jam with toast, pancakes, biscuits, and more! 

Sunday, September 15, 2013

Shrimp Puttanesca

This is a savory pasta dish that packs a lot of flavor between the shrimp, capers, and olives.   It's also relatively simple and doesn't require a lot of unique ingredients.  I found the recipe on Food & Wine and don't think I made any changes (except to leave the tomatoes unpeeled.)  They didn't call it a puttanesca, but considering the ingredients I decided to use that title.  Some puttanescas have anchovies in them, but this one does not.   Overall this is a good option for a quick and tasty week night meal.  And it gave me the chance to use a little fresh rosemary from the 1-herb strong garden, so that's always a plus.  We also tested our our new garlic-grating tool we got at the farmer's market in San Diego.  It's a little ceramic plate with sharp ridges that works miracles in grating garlic or ginger. 
Ingredients:

  • 3 tablespoons olive oil
  • 2 pounds medium shrimp, shelled
  • 4 cloves garlic, minced or grated
  • several dashes of dried red-pepper flakes (or more to taste)
  • 1/2 teaspoon salt
  • 1/4 teaspoon fresh-ground black pepper
  • 2-3 medium tomatoes (about 3/4 pound) chopped
  • 1 cup canned crushed tomatoes in thick puree
  • 1 teaspoon chopped fresh rosemary, or 1/4 teaspoon dried rosemary
  • 2 tablespoons drained capers
  • 1/3 cup halved and pitted black olives 
  • fresh lemon, to squeeze on top (optional)
Directions:
 
Heat a large skillet or frying pan to medium and add the oil.  When it is hot, add the shrimp to the pan along with the salt, pepper, red pepper flakes, and garlic.  Stir and try to spread the shrimp out evenly.  Stir occasionally until cooked through, about 4-5 minutes. Remove the shrimp with a slotted spoon.

Next, add the tomatoes, rosemary, capers, and olives to the pan.   Reduce heat and simmer, covered for 15 minutes.   Meanwhile, start boiling your pasta water.  Any type of pasta will do.


After the sauce has simmered, return the shrimp to the pan and cook until heated through, about 1 minute.  


Serve over pasta and garnish with additional rosemary and a squeeze of lemon.  


Sunday, September 1, 2013

Lime Ice Cream Pie

This is a perfect summer dessert- cold and refreshing with just the right amount of sweetness.  It's also incredibly easy to make- no ice cream maker or special kitchen utensils required, other than a food processor for the crust.  The tart and creamy filling pairs wonderfully with the homemade graham-cracker crust which is buttery and sweet.  It's also nice that this keeps in the freezer for several days (or even a couple weeks) so you don't have to eat it all in one sitting.  Or you could make two and save one for later.  Either way, this is sure to be a success for you and your guests!  Thank you to Serious Eats for the recipe, which was unaltered.  Note that there is a good amount of wait time in this recipe so get an early start on it if you plan to consume it in the same day. 
This also gave me a chance to use my DIY cake stand!

Ingredients:

Crust:
  • 10 plain graham crackers
  • 1/2 teaspoon kosher salt
  • 3 tablespoons white sugar
  • 5 tablespoons butter, melted and slightly cooled
Filling:
  • 1/2 cup lime juice (3-4 limes)
  • 1 tablespoon lime zest, plus more for garnish, from about 1-2 limes
  •  3/4 cup sweetened condensed milk
  • 1 cup heavy cream
  • 1/4 teaspoon salt

Directions:

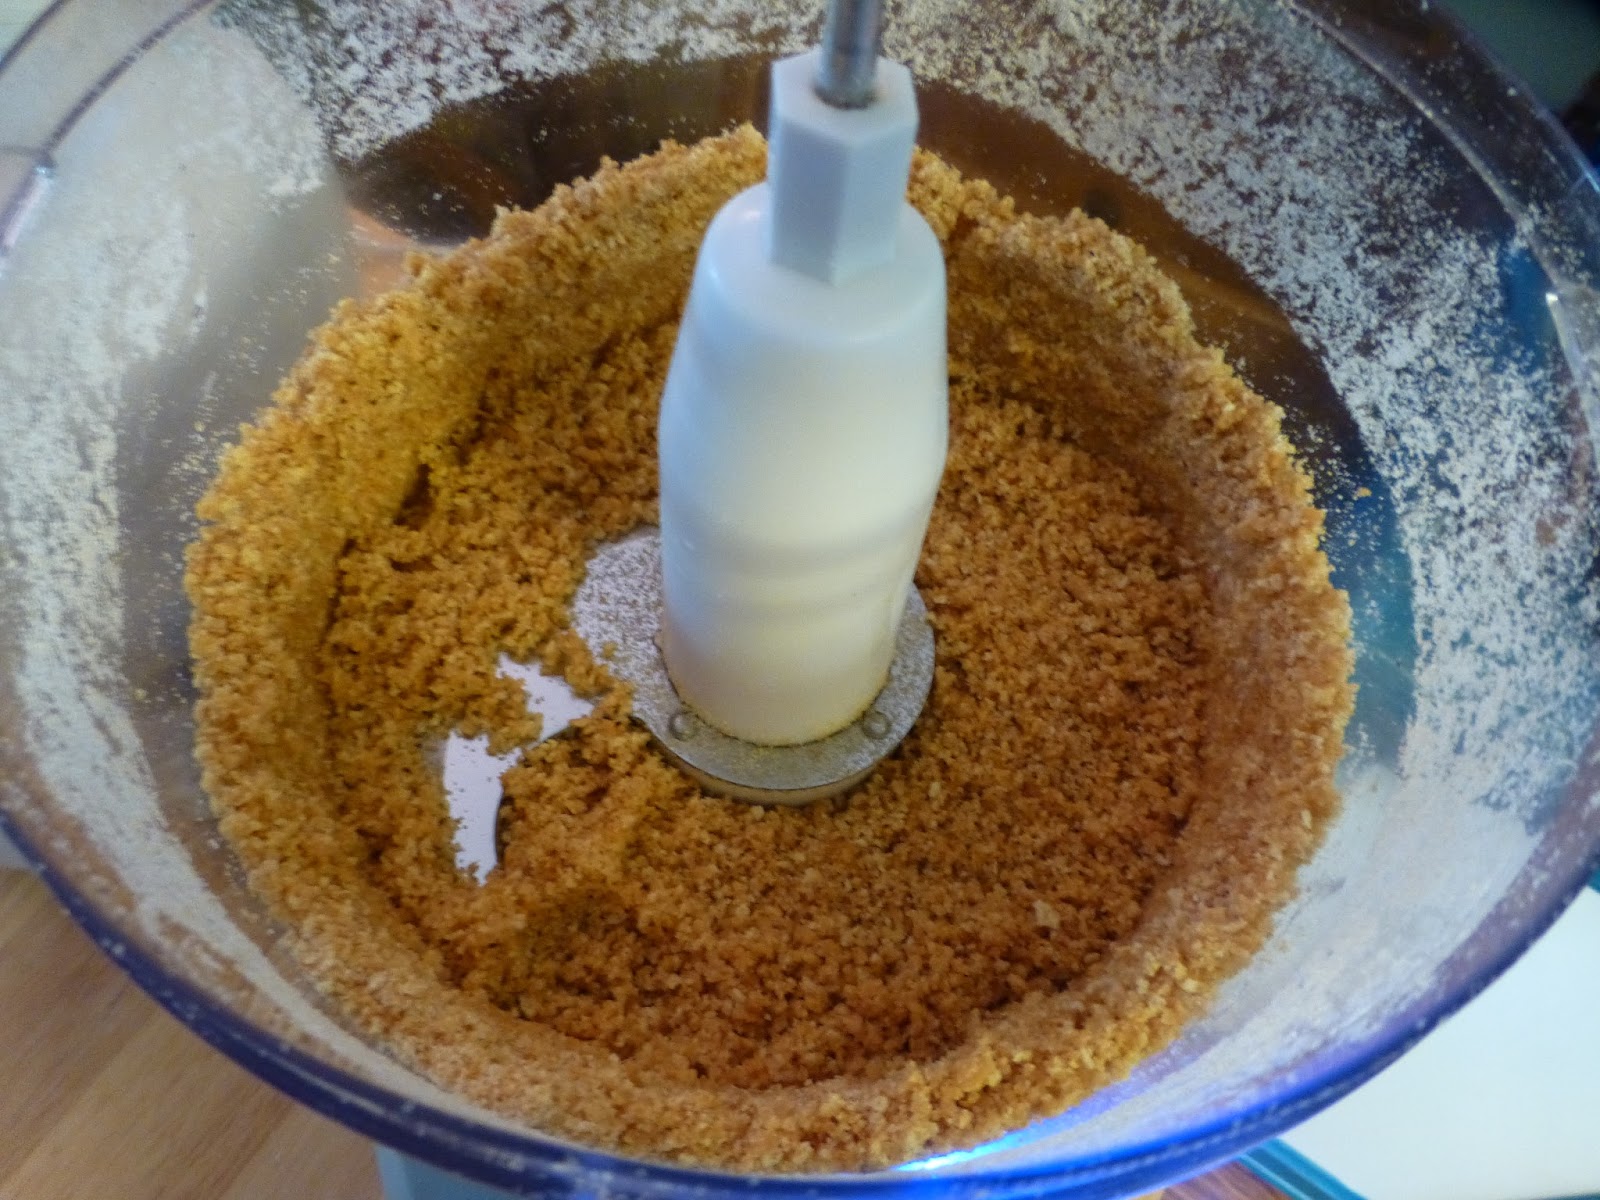
Start by making the pie crust.  In a food processor, combine the graham crackers, salt, and sugar.  Pulse until it is the consistency of fine bread crumbs.  Add the butter, and pulse until a course meal forms, scraping down the sides as necessary.   Transfer to a pie plate or tart pan and press evenly down into the bottom and sides of the dish.  As a note, the filling will not completely fill a pie plate to the top, so you don't need the crust to come all the way up to the top of the sides.  


Refrigerate for 15 minutes, and then preheat the oven to 375°F.  Bake the crust for  15 minutes, until it starts to turn a darker golden brown.  Remove from oven, let it cool, and the place in the freezer until you are ready to pour in the ice cream filling.  

To make the lime ice cream, combine the condensed milk and heavy cream in a medium mixing bowl. Stir to combine and then add the lime juice and lime zest.  Stir slowly.  The mixture will almost immediately thicken.  


Add the salt, stir, and then pour into the frozen crust.  Smooth out the top, cover with plastic wrap, and place in the freezer for 2-3 hours before serving.  

When you are ready to serve, let the pie sit out for about 5 minutes to soften before slicing.  Garnish with additional lime zest.  Enjoy!


Tuesday, July 23, 2013

Grilled Nectarines with Blue Cheese and Basil


We've been enjoying having a grill this summer after several years of apartment grill-free living.   I was channel surfing and happened across Bobby Flay making these sweet grilled nectarines, dressed with blue cheese, citrus vinaigrette, and basil.  The flavor combo is one of a kind- the juicy caramelized fruit with the tangy blue cheese, sweet and tart vinaigrette, topped with fresh basil.  This dish would be a great appetizer and is also a nice side dish when paired with something spicy.  It could even pass as dessert, though it's not overly sweet.  Best of all, it is easy to make and by combining these few ingredients you have a upscale dish that is bound to please your guests. 
Cara Cara orange- looks like a grapefruit! Tastes like an orange.
Ingredients:
  • 4 nectarines, barely ripe
  • 2 oz (about 1/4 cup) blue cheese
  • 1/2 lemon, juiced
  • 1/2 orange, juiced
  • 1 1/2 tablespoons honey
  • a few leaves of fresh basil, sliced in thin ribbons
  • salt & pepper
  • canola oil 
Directions:

To make the vinaigrette, combine the lemon juice, orange juice, 2 tablespoons oil, honey, and a pinch or two of salt and pepper.  Whisk and set aside.  
Slice each nectarine in half, moving the knife around the pit and then gently pulling the two sides a part.  (This was harder than I thought it would be and I had to use a little extra effort on some of them)  Remove the pit, with your hands if it comes out easily, or using a knife if needed.  


With the grill over medium heat, brush the nectarines with oil and place face down directly on the grate.  (Hopefully it is clean!)  Let the nectarines cook for about 3 minutes, and remove once they have some nice grill marks forming.   It was too dark outside to get any pictures of the nectarines on the grill.
Next, scoop 1-2 teaspoons of blue cheese on to the center of each nectarine and then drizzle with the vinaigrette.  Top with sliced basil and serve warm.


Wednesday, July 17, 2013

Roasted Shrimp & Orzo salad

I was instantly addicted to this salad the first time I ate it, and ever since then it never fails to disappoint every time I make it.  The recipe comes from Ina Garten and it introduces a few genius techniques that make it extra delicious.  The first is to drench the hot, freshly cooked orzo in the lemon vinaigrette, causing it to soak up the flavor instantly.  The second is to roast the shrimp in olive oil, salt, and pepper.  This is by far the easiest way to cook a perfect shrimp and they taste amazing.  I had a hard time saving enough to toss into the salad.  The remaining ingredients- a combination of herbs, veggies, and feta cheese really make the dish come together.  We took this to a 4th of July cook-out this year and it was a huge hit.  I only changed a few slight things from Ina's recipe, and I assure you it turns out just as delicious!  The end result is a light and refreshing dish that could be served as a side dish or a main course.  
Ingredients:
  • 1 pound orzo pasta (rice-shaped pasta)
  • 1/2 cup freshly squeezed lemon juice (should take about 3 lemons)
  • Freshly ground black pepper
  • 1 1/2 pounds medium shrimp, peeled and deveined
  • 1 cup minced scallions, white and green parts
  • 1 cup chopped fresh dill
  • 1 cup chopped fresh flat-leaf parsley
  • 1 cucumber, peeled, seeded, and medium-diced
  • 1/2 cup small-diced red onion
  • 1/2 pound block of feta cheese, medium-diced
  • Kosher salt and freshly ground pepper


Directions:

Fill a large pot with water, add 1 tablespoon of salt and bring the water to a boil. Add the orzo and simmer for about 1 minute less than the recommended lowest number of minutes.  (If the box says 9-11 minutes cook them for 8) This will help you avoid over-cooking the pasta, considering it will keep cooking a bit more sitting in the pot.  While the orzo is cooking, whisk together the lemon juice, 1/3 cup olive oil, 2 teaspoons salt and 1 teaspoon of pepper. When the pasta is done, drain and return to the pot.  Immediately pour the lemon juice mixture over the hot pasta and stir well.  Keep orzo in the pot off heat to let it cool down while you prepare the rest of the ingredients.

To cook the shrimp, preheat the oven to 400 degrees F.  Place the shrimp on a foil-covered sheet pan, drizzle with olive oil, and sprinkle with salt and pepper. Toss to combine and spread out in a single layer. Roast for about 4 minutes, until the shrimp are cooked through. You can tell once they start turning pink and have a somewhat firm touch to them that they are done.  Always err on the side of under- you can cook them for a minute longer if needed but you can't undo it once they are overcooked.  Try not to eat them all straight out from the oven!!
Add the shrimp to the orzo and then add the scallions, dill, parsley, cucumber, onion, 1 teaspoons salt, and 1/2 teaspoon pepper. Toss well and taste for more salt.  Add the feta and stir carefully. 


Set aside at room temperature for 1 hour to allow the flavors to blend, or refrigerate overnight. If refrigerated, bring back to room temperature before serving.