Showing posts with label chocolate. Show all posts

Thursday, August 9, 2012

Chocolate Crack

I first saw this recipe on Serious Eats, and of course I had to make it.  It is so easy and tastes amazing; you really can't pass it up if you are a chocolate and caramel lover.  Our friend Katie came over this week and she brought all the ingredients to make this yummy dessert.  I was elated! It reminded me what a great recipe this is and that I should definitely make it more often.  It's just as easy to make a large batch as a small one, so this is a great idea for parties too.  
Ingredients:
1 1/4 cups butter (2 and a half sticks)
1 1/4 cups brown sugar
1 teaspoon vanilla
12 oz dark or semi-sweet chocolate pieces (We used semi-sweet and peanut butter chips, but the peanut butter flavor didn't really come through.  So I would just stick with chocolate)
Saltine Crackers (about 50 or one and a half stacks, for a large sheet pan)

Directions:

Preheat oven to 350 degrees F.  Cover a large sheet pan (about 12x17) with foil, and spray with non-stick cooking spray.  Place the Saltines in a single layer to cover the entire pan.

In a sauce pan, melt the butter over medium heat, stirring often.  Mix in the sugar and then stir in the vanilla.  Whisk or stir until it becomes an even dark brown color and you can tell all the butter has been incorporated.  (About 5 minutes)  When it starts to bubble, remove from heat.
Pour the caramel mixture over the crackers, somewhat evenly.  Spread it out with a spoon to make sure all the crackers are covered completely with the sauce.


Next, place the tray in the oven for 7 minutes until the caramel is bubbling around the crackers.  Remove from the oven and let it cool for a couple minutes before spreading on the chocolate.  Evenly place the chocolate pieces over the crackers and let them sit for 10 minutes so they melt enough to be spreadable.  


With a spoon, spread the chocolate evenly and then let it cool.  When the tray has cooled down, place in the refrigerator or freezer until it has hardened.  Once hard, break pieces of the bark off and peel the foil away.  Break them into smaller serving size pieces of any shape.  It's impossible not to become addicted to this stuff!  


Yummmmm!!!

Tuesday, January 31, 2012

Chocolate Truffles

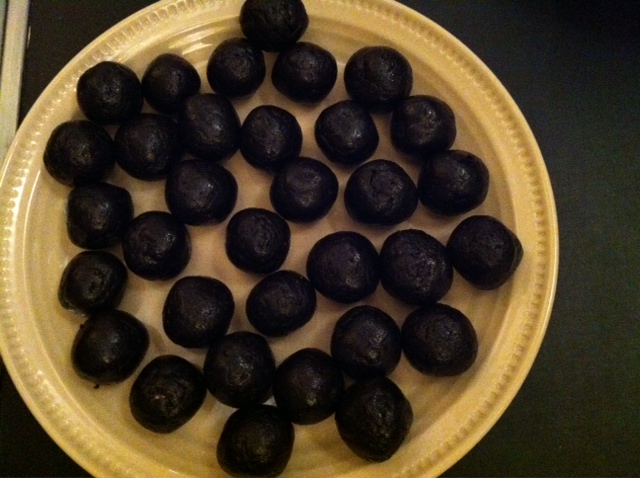
I still remember the first time I had these truffles- our friend Lauren brought them to a New Years party and they were so amazing that I had to get her recipe.  I was shocked when she told me how easy it was - and only three ingredients!  Since then, we've made these countless times and they are always a big hit.  They are so rich and creamy on the inside, but without being too sweet.  And they are the perfect size to bring to parties.  You can dress them up with sprinkles, crushed nuts, white chocolate drizzle, or any number of things to make them fit for your special occasion.  These we just left plain, but use your imagination!  They fit perfectly inside mini-cupcake wrappers for serving. 
Ingredients:
1 package regular stuffed oreo cookies
8 oz cream cheese
2 cups (about one bag) semi-sweet chocolate chips
1-2 T vegetable oil or hazelnut/peanut oil (optional, but it does make the melted chocolate chips a little easier to work with)

Directions:
Place all of the cookies in a large food processor.  (I've done this with a small one, and I had to split it into three batches)  Pulse until the cookies have formed a fine powder.


Next, cut the cream cheese into about 1 inch chunks and add it to the food processor.  Pulse and slowly incorporate cream cheese at a slow speed until it is evenly blended in and a thick ball of dough is formed.

Begin rolling the dough into balls, slightly smaller than a ping-pong ball but larger than the width of a quarter.  If you have the time, you may want to chill the dough before working with it to make it a bit firmer and easier to roll.   Continue until all of the dough is formed into equally sized balls.

Melt your chocolate chips by putting them in a bowl and microwaving them for 30 seconds to 1 minute at a time, stirring in between until they are fully melted.  Add the oil if you choose to use it and stir until combined.  The chocolate should be smooth but not too hot that you can't touch it with your fingers.  

Set up some wax paper to put your truffles on as you dip them in the chocolate.  Use your fingers to dip each ball in the chocolate and evenly spread it around.  It is a little messy but gets easier with practice.
Let the truffles sit until the outer shell has hardened, preferably in the fridge.  If you are adding any toppings, it is best to do it when they are still wet so the topping will stick.  Once they are dry you can move them to an air-tight container in the fridge until you are ready to serve.  I put mine in their little cupcake holders before storing so they wouldn't actually touch each other.  The number of truffles will vary based on how large or small you make the balls.  We usually end up with about 25-30.  These are sure to impress your friends at your next big event!