Shrimp and rice is one of my favorite combinations so I immediately saved this recipe when I came across it a while ago. I chose to make it recently as I was perusing dinner options, for it's simplicity and comforting appeal. This dish is made in one pot and there's nothing complicated about it, making it a win-win. The cayenne, tomatoes, and lemon juice all add a ton of flavor to the rice and shrimp, and when combined with the crumbled bacon, it's hard to top! (Not to mention that the recipe starts with sauteing onions in bacon fat.) The result is a tasty, comforting, and surprisingly light bowl of flavorful rice and perfectly cooked shrimp. This is perfect for dinner but would also make a great brunch.
 Ingredients:
- 2 cups long grain rice
- 1/2 lb sliced bacon, finely chopped
- 2 onions, finely diced
- 2 cloves garlic, minced
- salt and pepper
- 3/4 teaspoon freshly grated nutmeg
- 1/4 teaspoon cayenne pepper (or more)
- 3 cups low-sodium chicken broth
- 1 can diced tomatoes
- lemon juice from half of a freshly squeezed lemon
- 2 teaspoons Worcestershire sauce
- 2 lbs medium raw shrimp, peeled and deveined
- 1/4 cup finely chopped parsley
- lemon wedges, for serving
Directions:
Rinse and drain the rice- set to the side. Meanwhile, cook the bacon in a large pot or dutch oven over medium heat, stirring occasionally until it starts to crisp and brown.
Remove from the pot to drain on a paper towel, leaving at least 3 tablespoons of bacon fat in the pot. Add the onions and 1/2 teaspoon salt and saute for about 5 minutes. Add the garlic and cook 2 more minutes.
Next, add the rice along with 1 teaspoon salt, 1/4 teaspoon black pepper, nutmeg, and cayenne.
Stir and cook for one minute. Pour in the tomatoes with their juices, chicken broth, lemon juice, and Worcestershire sauce.
Bring to a simmer and cover for 20-30 minutes. Check after 20 minutes to see how cooked the rice is. If it tastes like it's almost done, add the shrimp. If it is still pretty al dente, let it cook a bit longer until the rice is almost done before adding the shrimp. Stir them in and cook with the lid partially off the pot, stirring often. Leave the lid completely off if your mixture is a little soupy. Add more broth if it starts to dry out. After 10 minutes the shrimp should be fully cooked through.
Taste for more seasoning. Serve immediately, with fresh parsley and a lemon wedge.
Hoppin' John is a cheap, delicious, and pretty nutritious one-pot dinner- a great way to enjoy your New Year's day black eyed peas. (Or on any day for that matter) The addition of bacon adds some savory smoky flavor, and the red pepper flakes give it a nice kick of heat. Black eyed peas don't take as long to cook as dry beans, and you should check them often to avoid over-cooking... as I learned from experience. This is a hearty & warm winter dinner, but could also be eaten as a side dish with something like pork tenderloin. The recipe came from Michael Ruhlman's website.
Ingredients:
- 1 pound black-eyed peas, rinsed and picked through
- 3 cups low sodium chicken broth
- 2 large onions, one peeled and quartered, one medium diced
- 2 carrots, cut in half
- 4 bay leaves
- kosher salt to taste
- 8 ounces bacon, cut into 1/4-inch strips (preferably slab bacon)
- 5 cloves garlic, roughly chopped
- 2 teaspoons ground cumin
- 1 teaspoons red pepper flakes (or more if you like it really hot)
- 1 teaspoon finely ground black pepper
- One 28-ounce can whole peeled tomatoes, undrained
Directions:
In a large pot, combine the rinsed black eyed peas with the quartered onion, carrots, and three bay leaves with 1 teaspoon salt Add the chicken broth and then enough water to cover the beans and vegetables by about 3 inches. This was a great opportunity to use our new ladle which has a built in measuring cup. It was great for adding the chicken stock.
Put the pot over high heat, bring it to a simmer, then turn the burner
to medium low and continue to cook until the beans are tender, 60 to 90
minutes. (As a note, mine simmered for about 60 minutes and they were a bit over-cooked. So test them earlier just in case). Add 1 more teaspoon of salt midway through the cooking. Reserve 1-2 cups of
the cooking liquid. Strain the peas, picking out and discarding the
onion, carrots and bay leaves. Pour the peas back into the pot until ready to add to the rest of the dish but keep off the heat.
Meanwhile, in a large pot, cook the bacon over medium-low
heat until the fat is rendered and the bacon is browned.
Add the medium
diced onion, chopped garlic, and 1/2 teaspoon salt. Cook
until the onion is softened and translucent and beginning to brown, 5 to
10 minutes.
Add the cumin, pepper flakes, and black pepper, turn the
burner to medium, and stir to combine the seasonings with the onion. Add
the juice from the tomatoes. Then add the whole tomatoes, crushing them in
your hands as they go into the pot. Add the last bay leaf. Bring
this to a simmer and cook for 30 minutes or so to reduce and thicken the
sauce.
Next, stir in the black eyed peas and heat through. Add some or all of the reserved cooking liquid if the mixture looks a little dry. Taste for more salt and/or pepper. Serve hot and enjoy!
Toward the end of summer, the farmer's market was overflowing with peppers. I picked up a variety of jalapenos, banana peppers, and wax peppers and decided to pickle them all together. While banana and wax peppers are not as spicy as the jalapenos, when they are combined together they take on some of that heat and become pretty spicy in my opinion. They are great to add a little kick to a pizza or sandwich, and we also fried some of them in tempura batter which was delicious. You could even blend them up for a spicy relish or spread to go on a hot dog or burger.
Ingredients:
1 lb hot or mild peppers - any variety (should be about 4 cups when sliced)
2 tablespoons sugar
1 tablespoon salt
1/2 cup apple cider vinegar
2 tablespoons vegetable oil
Directions:
Slice the peppers in thin rings- removing seeds to decrease the level of spiciness. I left a few in but removed most of them. In a bowl, toss the peppers with the sugar and salt and let them sit for 20 minutes, mixing occasionally. This will start to soften them and bring out some of the flavor. Drain any liquid that has gathered at the bottom of the bowl, and then add the vinegar and oil.
MIx to combine and refrigerate. Stir the peppers every 30 minutes or so for the next couple hours, and then store in the fridge for up to 2 weeks. We had them on a pizza as pictured below, but there are many other uses for these spicy pickles!
The spice blend in this recipe really packs in the flavor, and is complemented by the light and creamy coconut milk and fresh basil. You can make it as spicy as you like by altering the amount of jalapeno pepper that goes in the recipe. Served over rice, this is a delicious and satisfying meal! I found this recipe on Simply Recipes and only made a couple slight changes with the amount of spices used. This was also a great way to use up some of the fresh basil from our garden before the cold sets in!
Ingredients:
- 1 teaspoon cumin
- 1/2 teaspoon salt
- 1/2 teaspoon ground coriander
- 1/2 teaspoon cinnamon
- 1/2 teaspoon ground cardamom
- 1/2 teaspoon freshly ground black pepper
- 1/2 teaspoon chili powder
- 1/4 teaspoon turmeric
- 1/4 teaspoon ground cloves
- 1 lb boneless skinless chicken thigh or breast, cut into 1 inch chunks
- 1 large onion, chopped
- 5 cloves garlic, minced
- 2 jalapeño peppers, seeded and minced (we left the seeds in but it was pretty spicy)
- olive oil or grapeseed oil
- 1 14-oz can coconut milk
- 2 teaspoons cornstarch
- 1 teaspoon Worcestershire sauce
- 3 tablespoon fresh basil leaves, chopped
- 1 tablespoon finely chopped fresh ginger
- salt and pepper
Directions:
Mix all of the spices (first 8 ingredients) together in a bowl. Add the chicken and stir until all of the pieces are evenly coated. Let it sit for at least 30 minutes at room temp, or in the fridge for an hour or two.
In a large skillet, heat one tablespoon of oil over medium-high heat and add the onion and jalapeno peppers. Sprinkle some salt and pepper and let them cook for about 5 minutes, stirring occasionally. Add the garlic and cook for 2-3 minutes more. Remove this mixture and place it into a medium bowl so you can use the same pan for the chicken.
 You will likely have to do the chicken in two batches to make sure it doesn't get over-crowded in the pan. Heat another tablespoon of oil over medium-high and place the chicken into the skillet. Brown for a few minutes on each side, and until the chicken is fully cooked through. Remove to the bowl with onions, and then continue with the remaining chicken.
Meanwhile, open the coconut milk and mix a couple tablespoons with the corn starch in a small bowl until it has dissolved. Once all of the chicken is cooked and removed from the pan, add the coconut milk along with the corn starch mixture. Cook over medium heat and stir until thick and bubbly. Add the Worcestershire, basil, and ginger.
Stir to combine and then add the chicken and onion mixture. Mix well so all of the chicken is coated in the sauce.
Serve over hot rice, and enjoy!
You will likely have to do the chicken in two batches to make sure it doesn't get over-crowded in the pan. Heat another tablespoon of oil over medium-high and place the chicken into the skillet. Brown for a few minutes on each side, and until the chicken is fully cooked through. Remove to the bowl with onions, and then continue with the remaining chicken.
Meanwhile, open the coconut milk and mix a couple tablespoons with the corn starch in a small bowl until it has dissolved. Once all of the chicken is cooked and removed from the pan, add the coconut milk along with the corn starch mixture. Cook over medium heat and stir until thick and bubbly. Add the Worcestershire, basil, and ginger.
Stir to combine and then add the chicken and onion mixture. Mix well so all of the chicken is coated in the sauce.
Serve over hot rice, and enjoy!
This is one of Sean's favorite dishes for his mom to make- I first had it at her house, and I remember several times later when she made it again per Sean's special request. Not that I was complaining, because this Asian-style steak is sooo good. It's probably the first time I ever had flank steak too, which I instantly fell in love with (though it's unfortunately a little pricey). Anyway, I've never tried to make this before because I really can't compare with Joy's cooking, but when Sean recently requested it I couldn't resist. We came up with our own marinade for the steak and created a sweet & spicy carrot-chile sauce to go on top. The drippings and bits of garlic left in the pan after cooking the steak were mixed with rice and chopped kimchi for a tasty side dish. I'm pretty sure our friends that came over for dinner were glad they came :)
Ingredients:
2 lbs flank steak
1/2 small white onion, finely diced
4 green onions, thinly sliced
3 cloves garlic, minced
2 Thai chiles, minced
3 tablespoons soy sauce
3 tablespoons rice vinegar
2 tablespoons sherry
1 tablespoon sugar
1 lime, juiced
1/2 teaspoon crushed red pepper flakes
1 teaspoon salt
2 tablespoons vegetable oil
freshly cracked pepper
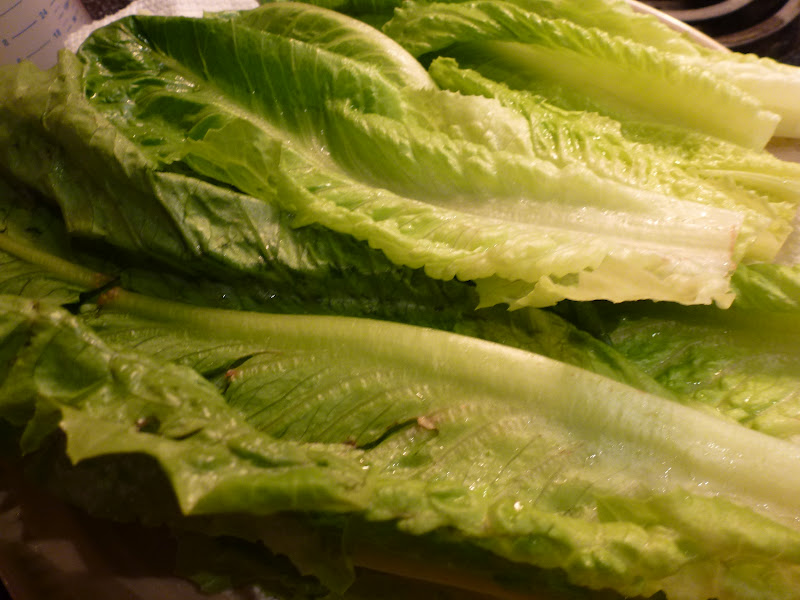
2 heads of romaine lettuce, largest leaves torn off and washed
more vegetable oil for cooking steak
For the carrot-chile sauce:
1/2 cup rice vinegar
1/4 cup water
1/2 cup sugar
1 tablespoon fish sauce
5 minced Thai chiles (more or less to taste)
1 1/2 tablespoons corn starch, dissolved in 1/4 cup water
2 carrots, shredded
Directions:
Prepare the marinade for the steak. Do this in the morning so it can marinate for at least 6 hours. Combine all ingredients in the first list (except the lettuce) in a bowl and stir to mix well.
In a large zip lock, combine the marinade with the steak. Press out the air and seal the bag. Distribute the marinade so it is evenly covering the meat. Place in the fridge and rotate every hour or so. Remove from the fridge at least 30 minutes before cooking. When you are ready to cook the steak, heat a large cast iron pan over medium-high heat. We had to cut our flank steak into two separate pieces because it wouldn't fit in the pan whole. Pour about 2 tablespoons vegetable oil in the pan once it is hot, and place the steak down. If it ever starts smelling like burning, turn the heat to medium.

Cook for about 4-5 minutes and flip. Cook for 4 minutes longer. We adjusted our cooking time based on how the steak felt to see if it was done enough. We prefer the meat medium-rare, and with the thicker steak we had to throw it in the oven for a few more minutes just to take it up from rare. Check your steak as you cook it because the time will vary depending on how hot your pan is and how thick the steak is etc. Both sides should be caramelized and browned- but not burnt. Every once in a while I did have to scrape up the onion or garlic bits that were sticking to the bottom to make sure they didn't burn either.
If you want to make the kimchi-rice when you are done with the steak, add 1 cup or more of chopped kimchi to the pan when the steak has been removed to set before slicing. Scrape up all the bits from the pan, and pour the mixture into two cups of cooked rice. Stir and add salt/pepper as needed.
Let the steak rest for at least 7-10 minutes before slicing. Tent it with foil so it doesn't lose it's heat. Slice against the grain in long thin slices.
To make the chile sauce (this can be done in advance) place all ingredients except corn starch into a small sauce pan over medium-high heat. Bring to a rolling boil. Turn heat down to medium. Boil for about 10 minutes or until it has reduced by half. Reduce heat to low and add the corn starch mixture. Stir and let the sauce thicken. When it has come to your desired consistency, remove from heat. Taste to see if you prefer it to be more sweet, spicy, or acidic, and adjust as necessary by adding more sugar, vinegar, or chiles. Remember you will be adding the carrots which will mellow out the flavor a bit.
Add the carrots to the thickened sauce and leave at room temperature or chill until ready to serve with the steak.
To serve, place several strips of steak onto a lettuce "boat" (large cupped lettuce leaf). Spoon some of the chile sauce on top, and enjoy this tasty meal!
We had leftovers the next day (above) and it was still delicious.