Tuesday, January 31, 2012

Chocolate Truffles

I still remember the first time I had these truffles- our friend Lauren brought them to a New Years party and they were so amazing that I had to get her recipe.  I was shocked when she told me how easy it was - and only three ingredients!  Since then, we've made these countless times and they are always a big hit.  They are so rich and creamy on the inside, but without being too sweet.  And they are the perfect size to bring to parties.  You can dress them up with sprinkles, crushed nuts, white chocolate drizzle, or any number of things to make them fit for your special occasion.  These we just left plain, but use your imagination!  They fit perfectly inside mini-cupcake wrappers for serving. 
Ingredients:
1 package regular stuffed oreo cookies
8 oz cream cheese
2 cups (about one bag) semi-sweet chocolate chips
1-2 T vegetable oil or hazelnut/peanut oil (optional, but it does make the melted chocolate chips a little easier to work with)

Directions:
Place all of the cookies in a large food processor.  (I've done this with a small one, and I had to split it into three batches)  Pulse until the cookies have formed a fine powder.


Next, cut the cream cheese into about 1 inch chunks and add it to the food processor.  Pulse and slowly incorporate cream cheese at a slow speed until it is evenly blended in and a thick ball of dough is formed.

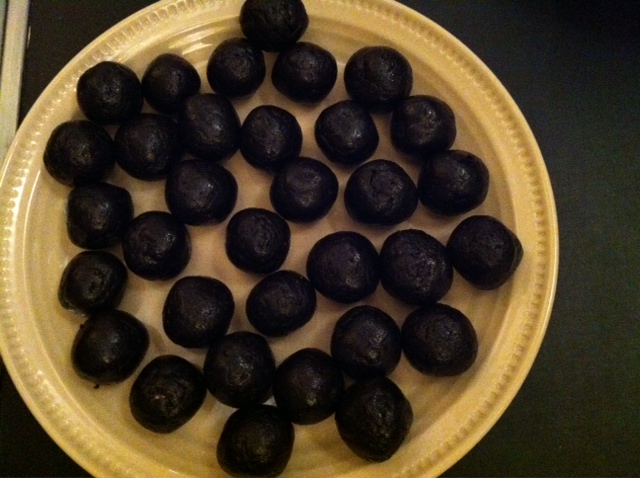
Begin rolling the dough into balls, slightly smaller than a ping-pong ball but larger than the width of a quarter.  If you have the time, you may want to chill the dough before working with it to make it a bit firmer and easier to roll.   Continue until all of the dough is formed into equally sized balls.

Melt your chocolate chips by putting them in a bowl and microwaving them for 30 seconds to 1 minute at a time, stirring in between until they are fully melted.  Add the oil if you choose to use it and stir until combined.  The chocolate should be smooth but not too hot that you can't touch it with your fingers.  

Set up some wax paper to put your truffles on as you dip them in the chocolate.  Use your fingers to dip each ball in the chocolate and evenly spread it around.  It is a little messy but gets easier with practice.
Let the truffles sit until the outer shell has hardened, preferably in the fridge.  If you are adding any toppings, it is best to do it when they are still wet so the topping will stick.  Once they are dry you can move them to an air-tight container in the fridge until you are ready to serve.  I put mine in their little cupcake holders before storing so they wouldn't actually touch each other.  The number of truffles will vary based on how large or small you make the balls.  We usually end up with about 25-30.  These are sure to impress your friends at your next big event!

Sunday, January 29, 2012

Korean Brunch: Steak, Eggs, & Kimchi Rice

I saw Korean brunch advertised at a local restaurant and couldn't stop thinking about it.  Who knew when we would actually be able to make it there on a Sunday morning so I opted to just make it at home for immediate satisfaction.  Luckily I had bookmarked this great recipe from Serious Eats so I knew exactly what I wanted to make.  It does require some planning ahead, as the steak needs to be marinated over night.  It really boosts the flavor of the meat, and it came out tender and juicy using our grill press instead of an actual grill.  The kimchi rice is spicy but doesn't take over the meal- a good complement to the steak and the fried egg which adds just the right amount of creaminess to the dish.  We also decided to make some mustard greens cooked with bacon and rice vinegar to have as a side dish with the meal.   It all tasted amazing together, and it was refreshing to have something totally different and unique for brunch.  I can't wait to surprise guests in the future with this delicious meal!
Ingredients:  
1/4 cup mirin (rice wine, available in the Asian section of most grocery stores) 
2 T finely grated Granny Smith apple 
2 T soy sauce 
2 T light corn syrup 
2 T finely chopped scallion or chives
1 T korean hot pepper paste pepper paste (gochujang or kochujang) 
1 T peeled and minced fresh ginger 
2 garlic cloves, minced 
1 1/2 t toasted sesame oil 
1 1/2 t unseasoned rice wine vinegar 
Four 5-ounce pieces skirt steak 

For the kimchi rice: 
1 1/2 cups rice, cooked in salted water as directed (we used jasmine, but sushi or short grain rice would be more authentic)
Kosher salt 
2 T plus 1 t canola oil, divided 
2 cups kimchi, roughly chopped (we used one whole 16 oz jar)
2 T unseasoned rice wine vinegar 
2 T sriracha (hot sauce- you may not need this if your kimchi is already really spicy)
Freshly ground black pepper 
4 large eggs (or one per serving) 
Chopped scallions, for garnish

Find the mustard greens recipe here.
Directions:
Whisk all of the marinade ingredients together in a bowl (everything listed above the steak).  Pour into a large zip-lock bag and add the steaks.  Seal the bag and make sure all pieces of steak are coated.  Store in the fridge over night, bringing out about an hour before cooking so it can come to room temp.


For the rice:  Cook your rice according to its directions on the package, using salted water.   Meanwhile, heat your grill or grill pan to high.  Add the steaks and cook for about 3 minutes per side, enough to char the outside but still leave some pink in the middle.  Sprinkle with salt.  Take them off the heat and let them set for about 5 minutes before slicing.  


 In a skillet heat the oil and add the kimchi , sriracha, and rice vinegar.  Stir-fry for about 2-3 minutes and add to rice, mixing until all the rice is evenly coated.
Use the same skillet you cooked the kimchi in to fry your eggs.  Over medium-high heat, crack the egg right into the pan.  Sprinkle with salt and pepper, and remove when you can tell the egg white is completely set (no more clear).  Slice the steak into thin strips, against the grain.  Serve next to a mound of rice, and top with the egg.  This would go great with a simple salad, or with our bacon-rice vinegar mustard greens.  


Bacon & Rice Vinegar Mustard Greens

We had a ton of leftover mustard greens after we use some in our Italian sausage soup, so we used the rest up as a side dish for our Korean steak & egg brunch with kimchi rice.  It was the perfect complement to the meal, because no brunch can be complete without bacon!  We cooked it with rice vinegar and chicken broth to keep with the theme.  It really mellowed out their intense flavor and the mixture of tangy and salty flavors was a perfect balance.  This would be a great side dish with other breakfast items such as grits, or with pork or chicken for dinner.  
Ingredients:
1 large bunch of mustard greens, washed and torn or chopped into smaller pieces (they will cook down!)
4 slices bacon, chopped
2 T rice vinegar
1 cup chicken broth
kosher salt and freshly ground black pepper

Directions:
Start by cooking the bacon over medium heat in a large sauce pan.  When the pieces have all browned and look crispy, add the rice vinegar and chicken broth.  

Start adding the greens, a few handfuls at a time.  Stir them in and wait until they are partially wilted to add more.  

When all the greens have been added, cover and simmer for about 15-20 minutes.  Taste for salt and pepper.  Serve alongside your savory brunch or dinner.


Wednesday, January 25, 2012

Steel Cut Oats with Blackberry Orange Sauce

I've had a giant container of steel cut oats sitting in the back of the pantry ever since I accidentally bought them for granola, thinking they were the same as regular rolled oats.  As soon as I opened them I saw they wouldn't work.  Steel cut oats are made from the inner part of a corn kernel and they are cut only a couple times by the machinery.  The size and texture is almost similar to rice, and they take much longer to cook than rolled oats.  They are toasted to bring out the nutty flavor, and have a chewier consistency when they are cooked, similar to a creamy risotto.  I really fell in love with this recipe, and it's a healthy and filling breakfast that tastes great reheated throughout the week.  The blackberry orange sauce is a delicious compliment to the oatmeal and it adds sweetness without it tasting sugary.  These steel cut oats are a big improvement to regular oatmeal in my opinion, and I'll definitely be making them regularly from now on!
Ingredients:
1 cup steel cut oats
1 tablespoon hazelnut oil
3 cups water
1/2 cup coconut milk
1/2 cup milk
1/4 t salt
zest of 1 orange (reserve one teaspoon for the sauce)
juice of 1 orange (reserve one tablespoon for the sauce)
1/2 teaspoon vanilla extract
1 teaspoon cinnamon

For the Sauce:
6 oz blackberries (about 1-1.5 cups)
1/4 cup water
1 T sugar
1 t orange zest
1 T orange juice
1 t agave nectar (or honey)
1 t cornstarch

Directions:
In a skillet over medium heat, toast the oats in the hazelnut oil for about 5 minutes until fragrant, and set aside.
 
In a medium sauce pan, bring the water and both milks to a boil.  Add the toasted oats, reduce heat to low and cover.  Simmer for 25 minutes, stirring occasionally.  After 25 minutes the mixture should be much thicker.  Add the salt, orange juice, orange zest, vanilla, and cinnamon.  Cook stirring frequently for another 5-10 minutes.  Remove from heat.
For the blackberry orange sauce, combine all ingredients in a small sauce pan over medium heat.  Once the sugar and corn starch have melted in, bring to a simmer and begin to gently smash the berries which should be very soft at this point.    


Let it cook for about 10 minutes until it thickens to your desired consistency.  Serve over a bowl of hot oatmeal.