Cast Iron Makeover!
I'm not sure if you knew this, but my husband is a huge procrastinator. (Ok, so am I. I'm not sure WHERE I could have got that from) We have items lying around the house for projects we keep claiming we'll soon begin, but months go by without any progress. Such was the case with this beautiful but worn cast iron dutch oven that Sean spontaneously bought from GoodWill.com at a big discount. It moved around, finding new a new home somewhere in our apartment every couple months, but remained as damaged and unusable as ever. Finally, my threat of tossing it out convinced Sean to get to work repairing it. (Or at least I'll take credit for his sudden inspiration to get working.)
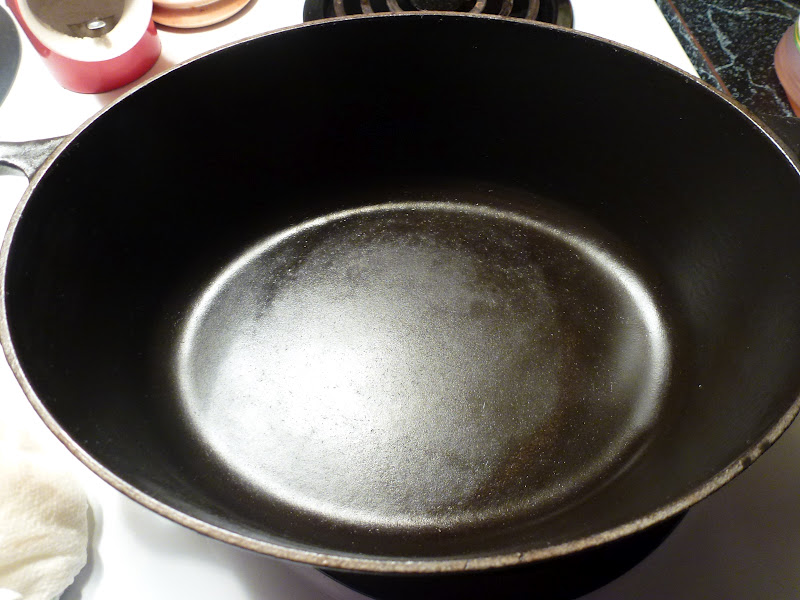
There are a few steps involved, and you do have to commit a decent amount of time to complete the project. But seeing the beautiful smooth cast iron replenished from it's rusty beginning is well worth the effort! (Says the person who didn't actually DO any of the work) I'm sure Sean would agree. Here's the before and after pics to convince you that this really is worth doing.
 |
| Before.... |
 |
| After!!! |
I'm truly proud of this amazing cast iron makeover, so I had to write a post about it! Here are the tools and steps Sean took to make this happen.
Equipment required:
Spray oven cleaner
Yellow rubber gloves
Trash bags
White vinegar (amount depends on size of cast iron you are working with- but it will be at least several cups)
Water
Basin for soaking
Copper wool
Hot soapy water
Grape-seed oil or Flax-Seed oil (or any oil with a high smoking temperature)
Instructions:
1. Begin by removing the old seasoning that has been left on the pan. Seasoning is the shiny black coating on a cast iron pan that makes it become nearly non-stick. But, after poor care or years of usage it can become uneven and rusty so you need to get the surface clear of this before re-seasoning. To do this, put on the gloves and spray the pot or pan with the oven cleaner in an open area (preferably outside). Place the cast iron in a trash bag, tie it, and let it sit for a day or two. Open the bag to check the surface, and repeat the process if it looks like some of the old seasoning is remaining.
2. Once you are certain the old seasoning is gone, lightly scrub the cast iron and place it in a basin with 2 parts water, 1 part white vinegar. You want enough liquid to fully cover your dish. Let it soak for one hour. We had to flip ours because it wasn't fully covered.
3. Scrub with copper wool in hot soapy water to remove any rust and ensure the surface is smooth.
4. Towel dry completely
5. Preheat the oven to 250 degrees F. Place the cast iron in the oven at this temperature for 15 minutes, and then raise it to 500 degrees F and bake for 45 minutes longer. This warms the oven more slowly than running a cleaning cycle which could warp or crack the cast iron.
6. Turn the oven off. Pull the cast iron out and rub it with oil using a few layers of paper towels. You want the entire pan or pot to be fully covered, but with a thin coat. Place it back in the oven, upside down to prevent pooling of oil in the bottom. The oven will still be very hot even though it is off, and it will cool down naturally over the next hour. Check the pot every 10 minutes, adding more layers of oil if it looks like the previous layer has completely soaked up. If oil seems to be pooling in one area, wipe that to keep it even with the rest of the surface. After about an hour of this process, you are done! Now, all you have to do is think of an amazing recipe to use for your cast iron christening!


No comments:
Post a Comment